
Introduction
Making changes to a WordPress website is an essential part of maintaining its performance, security and functionality. Businesses regularly update themes, install plugins, modify page layouts, introduce new features and improve website content. However, applying these changes directly to a live website can create unexpected problems. A plugin update may conflict with an existing feature, a theme modification may affect page layouts, or a new configuration may interrupt important website functions.
A WordPress Website Staging Environment provides a separate testing space where developers can make and review changes before publishing them on the live website. It creates a controlled copy of the website, allowing technical updates, design modifications and functionality improvements to be evaluated without exposing regular visitors to unfinished work.
Understand What a WordPress Website Staging Environment Is
A WordPress Website Staging Environment is a separate version of a live WordPress website used to test changes before they are published. It generally contains copies of the website’s files, database, themes, plugins, media and configuration settings. This allows developers to work with a version that closely resembles the production website without directly changing what visitors currently see.
A staging environment is commonly created through a hosting provider, a WordPress staging plugin or a manually configured development setup. Depending on the hosting infrastructure, it may use a separate subdomain, directory, server or isolated application environment.
Choose the Right Method to Create a WordPress Staging Environment
There are different ways to create a WordPress staging environment, and the right approach depends on the hosting infrastructure, website complexity, available technical resources and frequency of updates.
Important staging creation methods include:
- Hosting Provider Staging: Many hosting providers offer staging tools through their control panels. These tools can create a separate copy of the website and provide options to push approved changes towards production. Availability and deployment controls depend on the hosting plan.
- WordPress Staging Plugins: Dedicated plugins can help create a staging copy from the WordPress dashboard. They may provide website cloning, database copying and deployment features, depending on the plugin and licence.
- Manual Staging Setup: Developers can create a separate database, copy WordPress files and configure an independent installation. This method provides greater control but requires technical knowledge of databases, server settings and WordPress configuration.
- Local Development Environment: Tools such as Local or other local server solutions allow developers to create a website copy on their computers. This is useful for development and isolated testing, although it does not fully reproduce every live hosting condition.
- Separate Testing Server: Larger or more complex websites may use a dedicated testing server that closely matches the production infrastructure. This approach can support more detailed testing and controlled deployment workflows.
Also consider storage limits, staging refresh options, database handling and the ability to restrict public access.
Prepare Your Live WordPress Website Before Creating a Staging Copy
A staging copy is only useful when its source data is reliable and the live website is in a stable condition.
Create a Complete Website Backup
Website files include themes, plugins, uploaded media and core installation files, while the database stores posts, pages, settings, user information and other website content. Confirm that the backup can be accessed and restored when required.
Review the Existing Website Configuration
Check the WordPress version, active theme, installed plugins, PHP version, database version and important server settings. Record any custom configurations that may need to be reproduced in staging.
Identify Important Website Functionality
Prepare a list of important features such as enquiry forms, payment gateways, membership systems, booking tools, search functionality and external integrations. These features should be included in the staging test plan.
Create and Configure the Staging Website Correctly
The process varies depending on the selected hosting provider, plugin or manual setup method, but the objective remains the same: reproduce the important parts of the production website in a controlled testing environment.
Important configuration steps include:
- Create a Separate Staging Location: Use a dedicated subdomain, directory, local environment or isolated server. Keep the staging installation separate from the production website's files and database.
- Copy Website Files: Transfer the required WordPress core files, themes, plugins, uploads and other necessary resources. Check that important custom files are included.
- Duplicate the Database: Create a separate database for the staging website and import the required WordPress tables. Confirm that the staging installation does not connect to the live database unintentionally.
- Duplicate the Database: Create a separate database for the staging website and import the required WordPress tables. Confirm that the staging installation does not connect to the live database unintentionally.
- Update Website Configuration: Configure the staging installation to use its own database credentials and correct website address. Review the WordPress configuration file and environment-specific settings.
Visitors should be able to move from understanding a problem to exploring possible solutions and eventually evaluating whether the business is suitable for their requirements.
Build Trust Before Asking Visitors to Submit an Enquiry
rust is an essential part of the conversion journey because visitors are often cautious about contacting a business they have not worked with previously. Even when a website attracts relevant traffic and provides useful information, visitors may hesitate if they cannot understand the company’s experience, working approach or reliability.
Businesses should introduce trust-building elements throughout the website rather than placing all credibility information on a single page. The objective is to answer common concerns naturally as visitors explore different services.
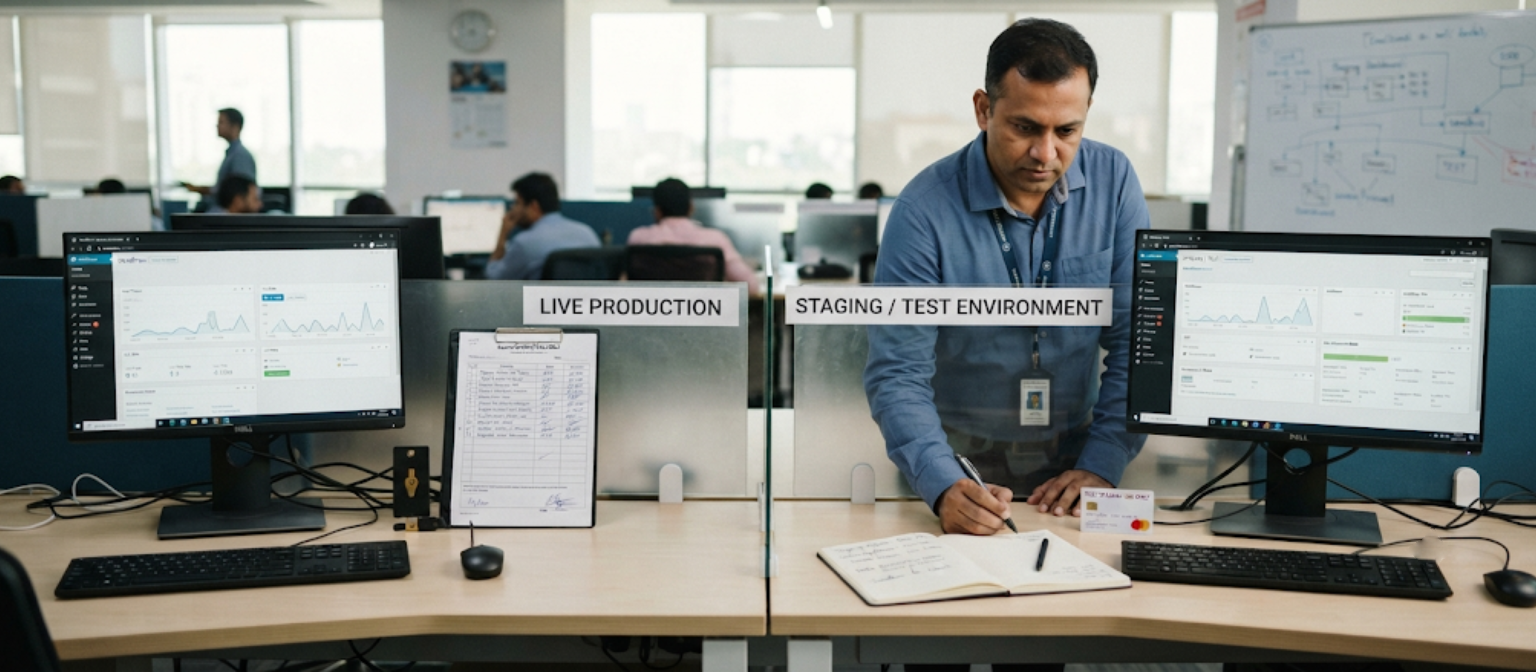
Test WordPress Themes, Plugins and Custom Code in Staging
One of the most valuable uses of a staging environment is checking whether website updates and custom modifications work correctly before they are applied to production.
Test WordPress Core Updates
Review new WordPress versions for compatibility with the active theme, plugins and custom functionality. Check important pages and dashboard operations after updating the staging copy.
Check Theme and Child Theme Changes
Test theme updates, template modifications and custom styling. If the website uses a child theme, confirm that its custom code continues to work correctly after the parent theme is updated.
Review Plugin Compatibility
Check whether important features, page layouts and integrations continue functioning as expected. Pay attention to plugins that affect forms, security, caching, SEO and e-commerce.
Check Website Functionality, Forms and E-commerce Workflows
Functional testing helps identify these problems before approved changes reach the live website.
Important website features to test include:
- Navigation and Internal Links: Check menus, dropdowns, breadcrumbs, footer links and important internal destinations. Confirm that visitors can reach the correct pages without encountering broken links.
- Contact Forms: Submit test enquiries, check required-field validation, verify confirmation messages and confirm that the expected notifications are generated through the test configuration.
- User Registration and Login: Test account creation, login, logout, password reset and relevant access permissions where the website provides user accounts.
- E-commerce Product Pages: Check product information, variations, pricing display, stock status, product images and add-to-cart functionality.
- Shopping Cart and Checkout: Test cart updates, discount codes, checkout validation and supported payment gateway sandbox transactions. Never use live payment credentials for routine staging tests.
- Search and Filtering: Verify website search, category navigation, product filtering, sorting and pagination.
Documenting test results helps developers identify repeated issues and confirm that important functionality works before deployment.
Review Website Performance, Security and SEO Before Deployment
Testing a staging website should include technical quality checks, not just visual and functional reviews. Changes that appear successful during development can still introduce slower page loading, security weaknesses or search visibility problems.
A pre-deployment review helps developers identify issues that could affect the live website after publishing the approved changes.
Performance testing should examine page loading behaviour, image delivery, caching, JavaScript execution and server response. Tools such as Google PageSpeed Insights and Lighthouse can help identify performance opportunities, although results may vary between staging and production because of differences in server resources and traffic conditions.
Deploy Approved Staging Changes to the Live WordPress Website
After testing is complete and all important issues have been resolved, approved changes can be prepared for deployment.
Create a Fresh Production Backup
Before deploying, create a new backup of the live website’s files and database. This backup should represent the latest production state, not just the earlier copy used to create staging.
Review Changes Since Staging Was Created
Compare the staging version with the current live website. Identify new enquiries, customer registrations, orders, content updates and other records that may have changed during development.
Select the Correct Deployment Scope
Determine which files, database tables, templates or settings need to be transferred. Avoid pushing the entire staging database when it may contain outdated customer information or test records.

Follow a WordPress Website Staging Environment Checklist
A reliable staging workflow requires consistent preparation, testing, approval and deployment procedures.
The following checklist can help developers and website owners review the complete staging process:
- Staging Environment Setup: Choose a suitable hosting, plugin, local or manual staging method. Confirm that the testing website has its own location, database and configuration.
- Production Backup Verification: Create a complete backup of the live website's files and database. Confirm that the backup is accessible and that a recovery process is available.
- Website Copy Verification: Check whether pages, media files, themes, plugins and important database records have been copied correctly.
- Access and Security Controls: Restrict staging access to authorised users, protect sensitive information and prevent public access to development-only features.
- Production Integration Separation: Use test credentials and sandbox services where possible. Prevent staging forms, payments and automated processes from interfering with live operations.
- Theme and Plugin Testing: Review WordPress core, theme, child theme, plugin and custom code updates for compatibility and unexpected errors.
Staging should become a regular part of the WordPress maintenance process, especially when websites receive frequent updates or support important business operations.
Conclusion
A WordPress Website Staging Environment provides an important layer of protection when updating, improving or maintaining a business website. It allows developers to test changes separately, identify compatibility issues, review website functionality and approve modifications before they affect the live customer experience.
A reliable staging process begins with a complete backup and a suitable testing setup. Developers should then verify the copied website, separate test integrations from production systems, review themes and plugins, test important functionality and check performance, security and SEO requirements.
Deployment also requires careful planning. The latest live website data should be protected, approved changes should be transferred using a controlled method and important website features should be checked again after publication.